개발공부/Spring Boot
[Spring Boot] Hello Spring Boot
환타몬
2022. 2. 7. 20:58
Intellij를 통해서 Spring Boot 를 실행하고, 간단한 방법으로 GET 메소드를 사용하기
1. Intellij를 실행한 후 우측 상단에 file -> new -> project를 선택.

Language 는 java,
Build tool은 Gradle
Artifact 는 hello
Packaging은 jar를 선택한 후 next
2. 웹 개발을 할 것이기 때문에 Spring Web을 눌러준 후 finish

3. 올바르게 실행되는지 확인하기

default port 번호는 8080인데, 만약 이미 톰캣 port 번호 8080를 쓰고 있다면 바꾸거나, 혹은 바꿔줄 수 있다.
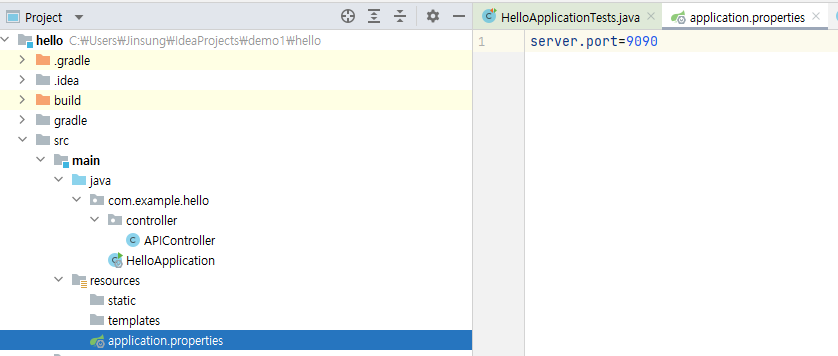
main - resource - application.properties 에서
server.port 로 포트번호를 변경해 줄 수 있다.
4. controller package를 생성 후 ApiController 클래스를 생성 후 아래와 같이 소스를 타이핑한다.
package com.example.hello.controller;

import org.springframework.web.bind.annotation.GetMapping;
import org.springframework.web.bind.annotation.RequestMapping;
import org.springframework.web.bind.annotation.RestController;

@RestController // 해당 Class는 REST API를 처리하는 Controller
@RequestMapping("/api") //RequestMapping 은 URI를 지정해주는 Annotation
public class APIController {

    @GetMapping("/hello") // http://localhost:9090/api/hello
    public String hello(){
        return "hello spring boot!";
    }
}
5. Talent API Tester로 이동 후 하단의 + Project 를 눌러 HelloSpringBoot 라는 이름의 프로젝트 생성

6. 프로젝트에 Add a request 하기

7. Request1 의 이름을 Hello Spring Boot 로 변경하고,
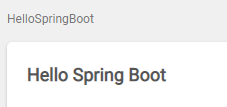
GetMapping Annotation을 통해서 생성한 주소로 이동한다.


그 후 요청을 실행한다.
- 출력화면

올바르게 실행된 것을 확인할 수 있다.
8. 마찬가지로 웹을 통해서도 확인할 수 있는데, 웹의 주소창에 위의 그림에서 요청한 주소로 이동한다.
